Tuesday, October 26, 2010

MintyBoost v3.0


If you own an iPhone, or any mobile phones that allows USB charging, MintyBoost maybe just the extra power pack you'll need if you are constantly on the go and your existing phone battery drains out before you can get to the electrical outlet.

I ordered this kit for USD19.90 from Adafruit Industries. It has everything except the batteries, container, which unfortunately, is hard to get at the moment because Wrigley's, the manufacturer of the Altoids gum has decided to discontinue this product. While the kit is designed to fit in nicely in the Altoids gum tin, it can still be installed in other containers. I got mine from a local Daiso store (Japanese variety store). It's slightly larger than the gum tin, but I think it'll be great as I can use the extra space to store a short cable.

To build the kit, you will need to have some basic electronic tools, and skills of course. The process of building the kit is layout in detailed here. You will not go wrong if you follow the instructions step by step.

The final product (with my version of tin anyways):
Note that my tin does not have the hinged lid. I wished it did though so I won't accidentally misplace the lid. Anyways, considering that this is the only container I could find, it will have to do.

These Eneloop batteries gives roughly about 60% charge. That means that if my phone's battery level falls to about 40-50%, I can get it to 100% with a pair of these batteries. Different batteries will give different results, but the general rule is the higher the mAh, the higher the capacity it can charge.
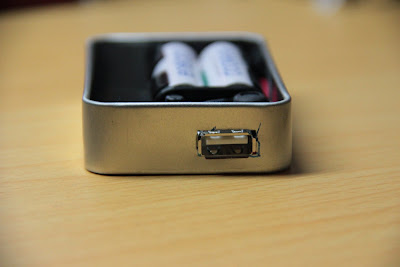
The opening for the port was done by drilling the tin first, and then using a small file, I filed the edges till I have the shape of the plug. I'm guessing if I had a dremel tool, the results would be better. What do you think?

Here's how it looks like with the lid closed.

Another view.

Wednesday, October 20, 2010

Barrel Drum BBQ Pit (Charcoal)

I decided to try this project after seeing so many other examples of it on the web. The thing about doing this here in Malaysia is that it can be quite costly as most of the parts are not locally produced. The most expensive part of the pit are the grill plates, which set me back about RM160 as they cost RM80 a piece.


The drum costs only RM40, but the scary part about this is that I don't know what was in it before. The drum supplier could not tell me either as they get their drums from all over. I bought it anyways after making sure it had no weird odors.

The hardest part of this project would be the cutting of the drum. Since I did not have an arc torch, I got it cut at a nearby workshop instead. All I did was draw the intended portion to be cut, and they did the rest.

Once that was done, I installed the L-braces for the grill plate to rest on, and added an additional metal bar in the middle for extra stability. I also added hinges to the plate to act as a lid to my pit. I had no welder with me, so all these were done using traditional nuts and bolts to secure.

The stand I used is a simple scissors type structure which was carried over from my previous bbq grill.


I also had the inside of the drum sprayed with a high-temperature paint to prevent corrosion. I got this paint at Ace Hardware.


Here is the final product:


Do you have your own version of a barrel drum bbq pit? Share it with me by posting the link on the comments. Thanks for viewing!

Monday, October 18, 2010

Date and Time on Arduino LCD Shield

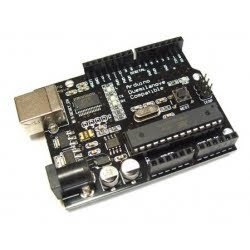
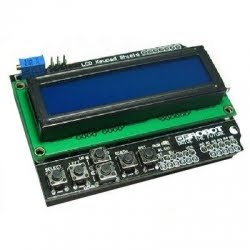
Here's a project you can try if you have an Arduino Duemilanove and a compatible LCD Shield. Both boards I'm using is an Arduino knock-off and they're from DFRobot, a Chinese retailer specializing in sale of electronic and robotic components. You can find more of their products here: http://www.dfrobot.com/. If you're in Malaysia, you can try out their distributor at http://myduino.com/. They carry most of DFRobot's inventory, and also some of the original Arduino boards.

For this hack, I used the following:
1. A DFRduino Duemilanove (Arduino Compatible) 328 board


2. DFRobot LCD Shield for Aduino


To program the codes, I use the latest Arduino Software, ver 0021, which you can download here: http://arduino.cc/en/Main/Software. This software allows you to write the script as well as compile the codes necessary for the Arduino to run.

Here are the codes I used:

#include <LiquidCrystal.h>
#include <DateTime.h>
#include <DateTimeStrings.h>

#define dt_SHORT_DAY_STRINGS
#define dt_SHORT_MONTH_STRINGS

// simple sketch to display a digital clock on an LCD
// see the LiquidCrystal documentation for more info on this

LiquidCrystal lcd(8, 9, 4, 5, 6, 7);
int backLight = 13; // pin 13 will control the backlight

void setup(){
pinMode(backLight, OUTPUT);
digitalWrite(backLight, HIGH); // turn backlight on. Replace 'HIGH' with 'LOW' to turn it off.

DateTime.sync(DateTime.makeTime(0, 44, 13, 16, 10, 2010)); // sec, min, hour, date, month, year // Replace this with the most current time
}

void loop(){
if(DateTime.available()) {
unsigned long prevtime = DateTime.now();
while( prevtime == DateTime.now() ) // wait for the second to rollover
;

DateTime.available(); //refresh the Date and time properties
digitalClockDisplay( ); // update digital clock
}
}

void printDigits(byte digits){
// utility function for digital clock display: prints preceding colon and leading 0
lcd.print(":");
if(digits < 10)
lcd.print('0');
lcd.print(digits,DEC);
}


void digitalClockDisplay(){
lcd.clear();
lcd.begin(16,2);
lcd.setCursor(3,0);

//lcd.print(DateTimeStrings.dayStr(DateTime.DayofWeek));
if(DateTime.Day <10)
lcd.print('0');
lcd.print(DateTime.Day,DEC);
lcd.print("/");

//lcd.print(DateTimeStrings.monthStr(DateTime.Month));
if(DateTime.Month <10)
lcd.print('0');
lcd.print(DateTime.Month,DEC);
lcd.print("/");
lcd.print((DateTime.Year,DEC)+2000);

//lcd.print(" ");
if(DateTime.Hour <10)
lcd.setCursor(5,1);
lcd.setCursor(4,1);

// digital clock display of current time
lcd.print(DateTime.Hour,DEC);
printDigits(DateTime.Minute);
printDigits(DateTime.Second);
}

You will need two additional libraries for it to work. They are the DateTime.h and DateTimeStrings.h. You can download them here: http://www.arduino.cc/playground/uploads/Code/DateTime.zip. Just copy both the folders to the 'libraries' folder in your Arduino directory.

Once you have all that done, stack the LCD shield on the Arduino board (make sure the pins line up), plug in the USB cables to the board as well as to your PC, and hit Compile on the Arduino software. The codes will be uploaded and you shall be able to see the result on your LCD screen!

If all goes well, you should be able to see the following:


Note that the keypad on the LCD shield is not functional as I did not include any codes for them to respond to. That itself may be the next hack for me to try!

Bugs/Problems/Feedback/Comments? List them down in the comments and I'll try my best to help you out!

Welcome!

Welcome to Hacks To Try. This blog is intended to serve news and articles of hacks that amateurs as well as professionals could try at home. While there are already many blogs around doing this, this blog is also intended to be a personal collection of favorite hacks that I intend to try in the near future.
Do leave some feedback or comment should find this helpful or useful!